
Nail your narrative
Before opening any slide software, nail your narrative. Start by distilling your big idea — your unique point of view and what’s at stake — and build an audience persona so you know who you’re speaking to. Then flesh out a storyline using a structure that fits your content, whether through whiteboarding, writing, or voice memos and AI. Finally, turn that narrative into a lightweight storyboard, so your slide design work becomes an exercise in execution rather than invention.
15 September 2026

Sumeet is the global head of culture and organisational design at Thoughtworks. In his past life, he was a software technologist for over two decades, working as a business analyst, product manager and transformation consultant.
This article is part of a series:
Slideware: a presentation program, such as Microsoft PowerPoint, LibreOffice Impress, or Apple Keynote.
In my previous post in this series, I argued for reserving presentations, recorded or live, for content that needs your voice. Live presentations should also merit the scheduling overhead. Once you’ve decided on a topic to present, it’s tempting to go straight to slideware. I suggest otherwise.
Narrative first, visuals next
The 16:9 slide format forces you to slice your narrative by visuals. When you don’t know what that narrative is, you’ll often second-guess yourself on every slide. Add to that confusion the distractions of font size, colour, creating diagrams, finding images, and deciding transitions and builds. The form precedes the function. This is why going to slides without a narrative creates a massive cognitive challenge for most presenters. This is also why we reach for shortcuts such as canned slides, so we can at least make progress with this demanding challenge.
I suggest nailing down your narrative before turning your attention to slides, which serve as supporting visuals. There are many ways to build a narrative, either on your own or with a co-presenter. But step 0 is to describe your key idea and your audience.
What are you saying and to whom?
When constructing my narrative, I find it useful to begin by identifying what Nancy Duarte calls the “Big Idea”. Consider it a way to describe the “so-what” of your narrative in a sentence. You can get to the big idea by describing its two constituent parts.
- What’s your point of view? This could be a contrarian take on a popular belief, a new perspective about a topic, a novel idea, a practice you want people to adopt, or something else.
- What’s at stake? Why should anyone care about your point of view? What if they don’t?
Once you’ve thought through those two parts, combine them into a single sentence that isn’t a mouthful and rolls off your tongue with ease.
Here’s an example of the big idea behind this video about the case against brainstorming.
| My point of view | What’s at stake? |
|---|---|
| Brainstorming feels scientific and collaborative, but research debunks it as a corporate superstition. Brainwriting (solo, anonymous, written idea generation) is a better approach. | Teams sabotage their best ideas through production blocking, conformity pressure, dominant personalities, and social loafing. By believing that brainstorming makes them more innovative, they lose out on valuable ideas and unique perspectives. |
| The big idea: Instead of brainstorming — a corporate superstition that kills your best ideas — adopt brainwriting and let independent judgment surface the widest range of ideas and the deepest thinking. | |
Alongside the big idea, identify your audience. I suggest a persona-building exercise to guide your thinking.
- Step 1: Give them a name. E.g Parul, the project lead.
- Step 2: Personify them with a photo or a stick figure. Having this sort of personified audience allows you to empathise with them as you build the narrative you’ll pitch. E.g., how will Parul feel when I challenge her assumptions about brainstorming?
- Step 3: Describe the persona. You can add as many details as are relevant to your narrative; e.g. role, prior experience and knowledge, goals, and interests.
- Step 4: Say why they’d care. Think about why they’d want to pay attention to your presentation. What problem might you address for them? How will the ideas in your presentation make their world better?
- Step 5: List what they’ll take away from the presentation. I suggest capping takeaways at three, so you don’t overload your narrative.
Sometimes, these persona details are evident and intuitive. You might be presenting to your teammates. In that case, you might speed through the persona-building step in minutes and tweak it a little after each iteration. In other situations, you may need to ask around to learn about your audience. For example, you may be presenting to a new client. In such situations, investing time to learn about your prospective audience will help you sharpen your eventual storyline.
Here’s an example of a persona for the same video I linked earlier in the piece.
Building the storyline
Are you ready to go to slides yet? Nope. Once you’ve identified your big idea and the top three takeaways, I suggest fleshing out your narrative to serve them. Narrative building is a subjective craft, so choose a story structure that fits your content. Here are six story structures I’ve used with success.
| Format | What it is | Stages |
|---|---|---|
| Sparkline | A narrative that swings back and forth between where things stand today and where they could go, using repeated beats to make the future feel real rather than abstract. | What is (today, as it stands) → What could be (the future you’re selling) — repeat as many beats as you need to make your point. |
| Explainer | A structured walkthrough of a concept or insight the audience doesn’t already have. It follows the “tell them what you’ll tell them, tell them, then tell them what you told them” format. | Context (lay of the land) → Story structure (the roadmap) → Steps (the narrative, step by step) → Recap (what you told them) → Celebrate! (a call to action) |
| Pitch | Recommends a new, inspiring solution to a problem the audience is experiencing, and makes that solution stand out from the obvious, boring options. | The windup (where we are today) → The hurdle (the problem) → The vision (the way out) → The options (a few paths — mostly boring, one inspiring) → The close (why the inspiring option wins) → The fine print (how it happens, plus a bonus) |
| Hook, meat, payoff | A short, punchy talk structure that grabs attention upfront, introduces the substance next, and then lands a conclusion that reinforces the opening. | Hook (a provocative opener — a question, challenge, or personal story) → Meat (structured narrative, e.g. lists or a timeline) → Payoff (call to action that connects back to the hook) |
| Situation, complication, resolution | This is the classic consulting shape. Start by describing the world as it is. Next, introduce a problem or opportunity, then land the solution that addresses it. | The situation (objective context) → BUT → The opportunity/complication (the challenge or opening) → THEREFORE → The resolution (the solution) |
| Hero’s journey | The most dramatic of the six. This structure starts in normalcy, descends into a crisis, hits rock bottom, then climbs back out stronger. It’s a Pixar/DreamWorks favourite, and a natural fit for project stories and experience reports. | The situation (normalcy before the problem struck) → The challenge (a problem you couldn’t ignore) → The crisis (things go south) → Hitting rock bottom (the worst point) → The comeback (how you fought back) → Emerging stronger (lessons learned) |
With unpredictable audiences, I’ve tried a seventh, more flexible structure in which one presentation holds multiple smaller storylines. In such presentations, I show my audience a list of potential topics to dive into. Each topic could have a different, independent story structure. Such talks give the audience a sense of control, but also demand a lot from you as a speaker. Neal Ford calls this pattern, “Á la Carte Content,” and it works well when you have more content than the time allows.
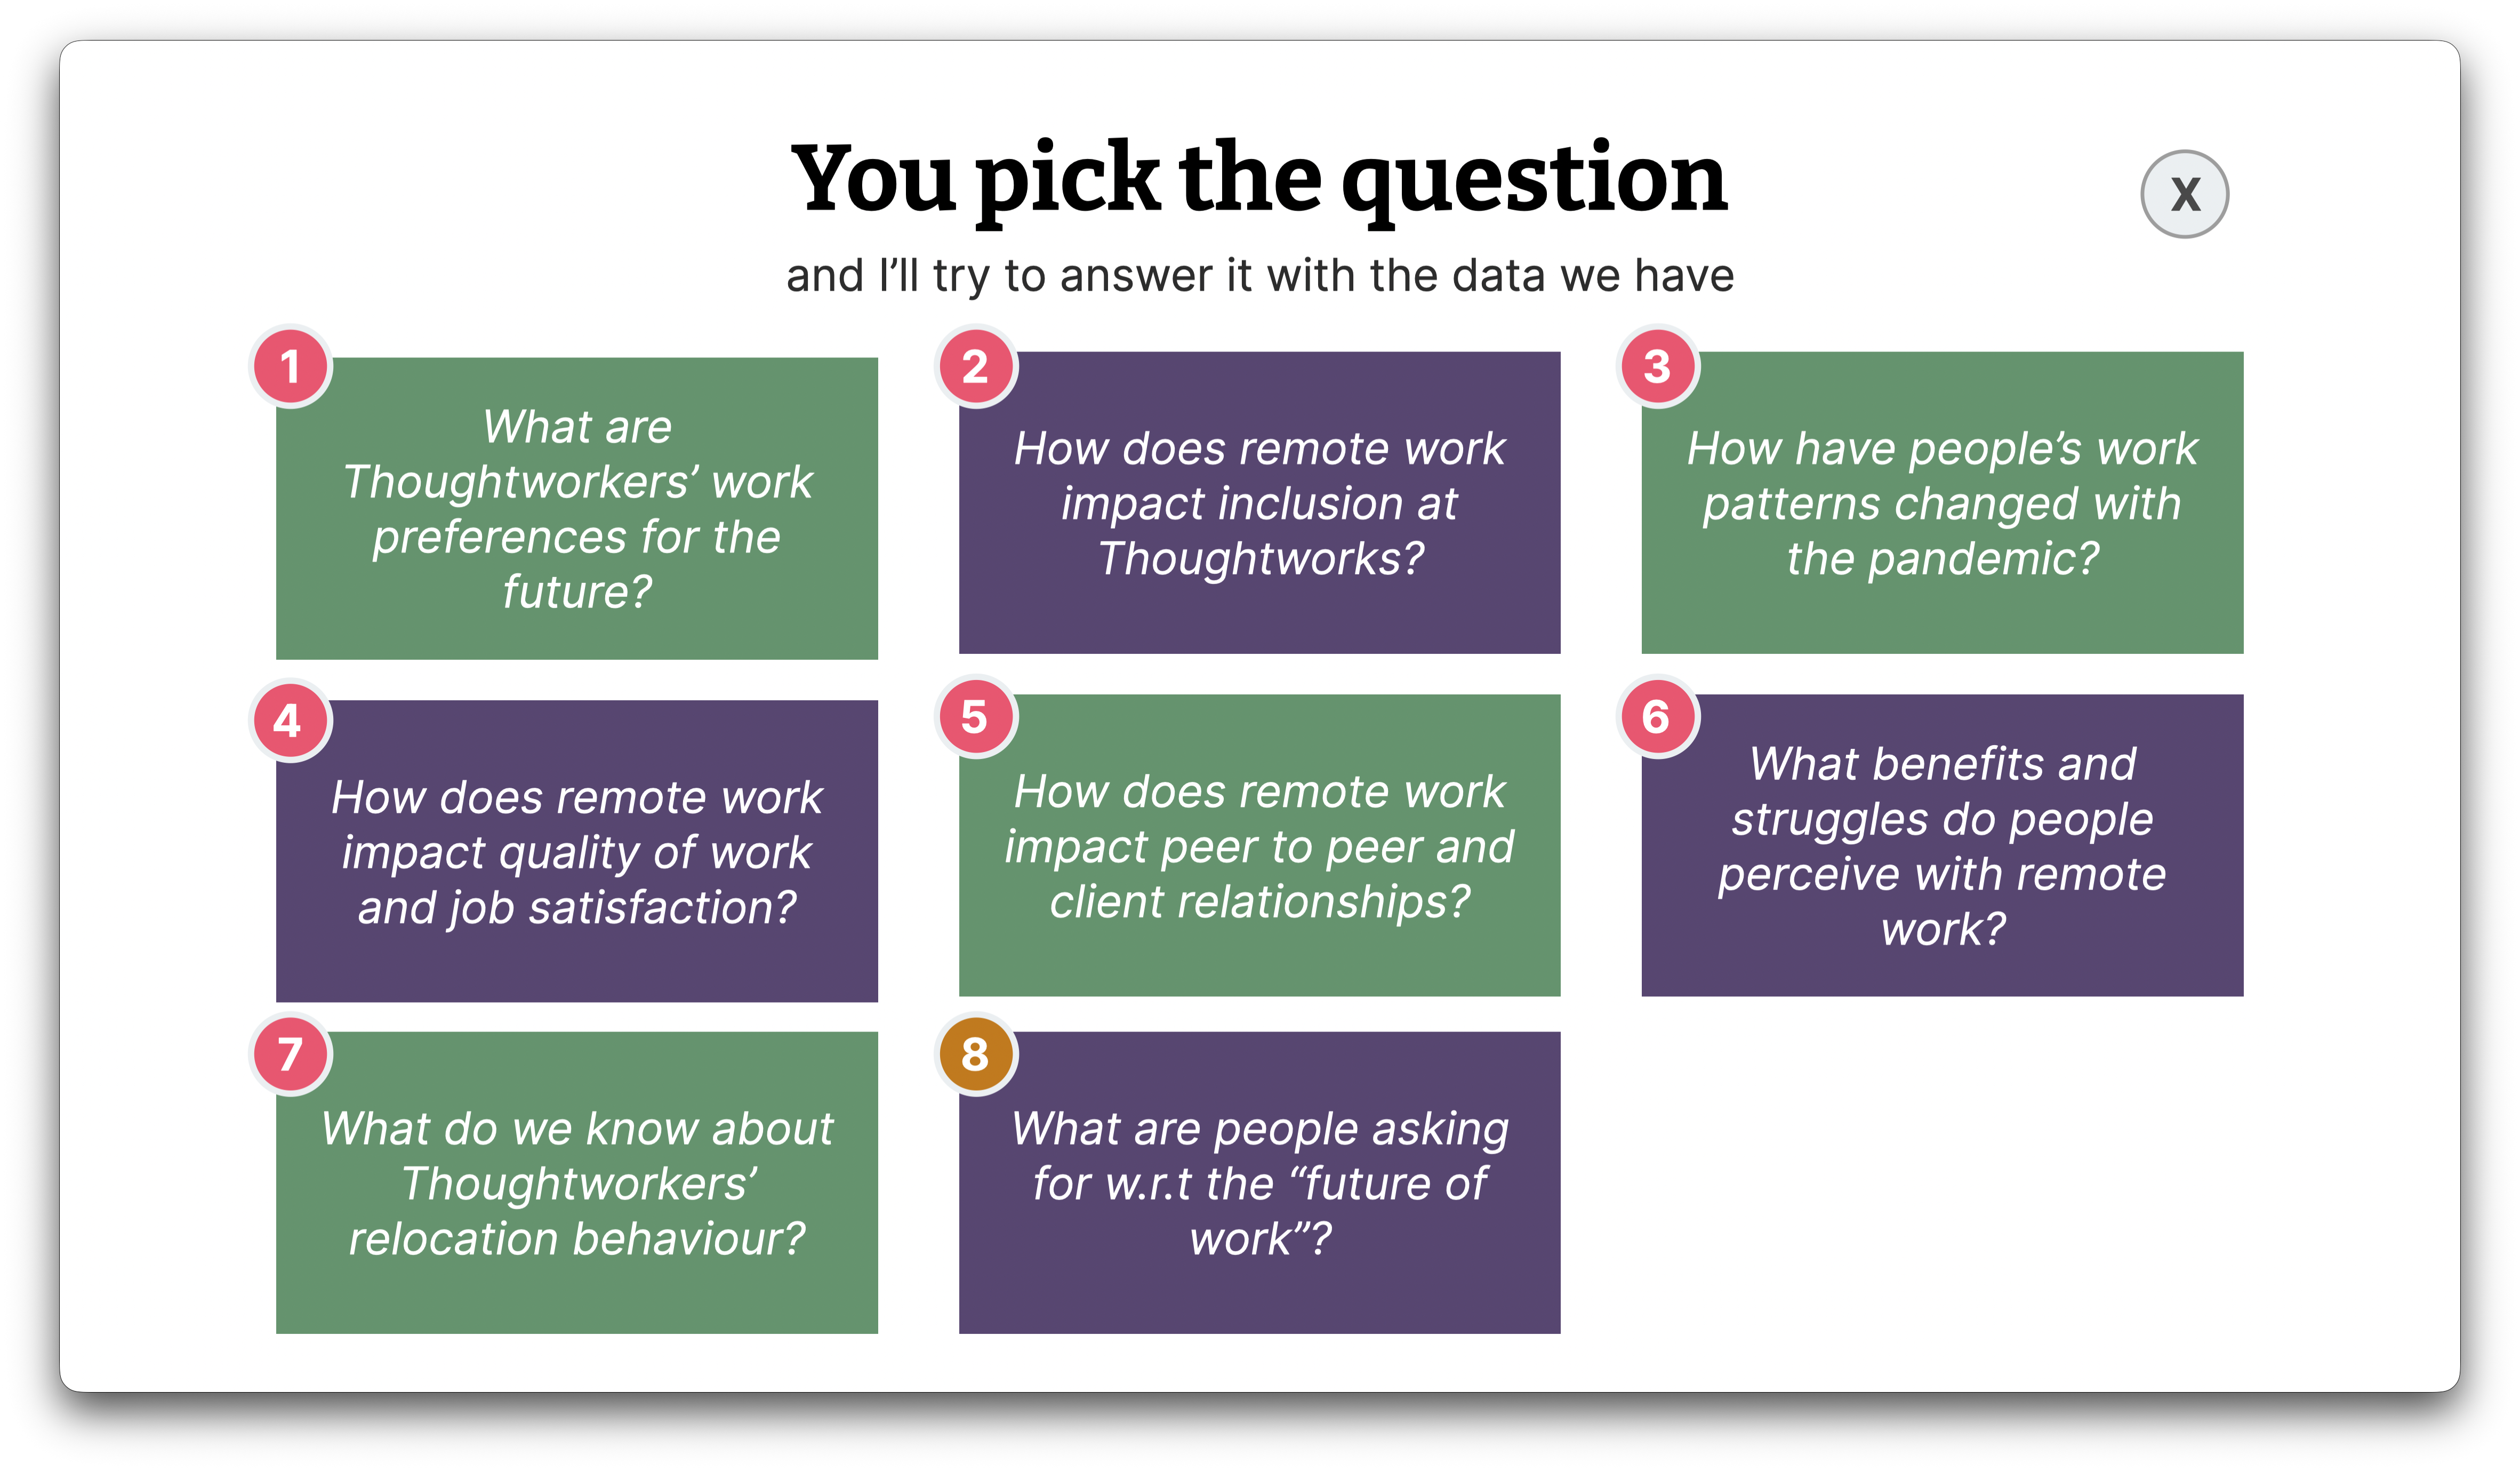
Figure 1: A flexible narrative structure. When reporting on an internal research survey, I let my audience choose the question they wanted me to answer using the research data.
If you’ve never built a storyline before, I understand it can be daunting. I suggest four approaches to building your storyline.
Collaborative whiteboarding
If you’re co-presenting with someone, I recommend whiteboarding your storyline with them. You can follow one of my recommended story structures, or build your own. Sticky notes on a physical whiteboard work fine, but if you’re remote, you can even use tools like Miro or Mural.
Sticky notes offer a distinct advantage for crafting your narrative. You can move stickies back and forth, edit them, or trash them. Colour-coding sticky notes helps you visualise related themes, and placing them close together helps you notice adjacencies.
If whiteboarding is your thing, I’ve created a Mural template with all my favourite story structures and panels, so you can outline your big idea and describe your audience persona.
Diagram-centric narratives
Of late, I’ve found myself creating presentations that start as a boxes-and-arrows style diagram in my notebook, or even on a slide. In these situations, the diagram becomes the spine around which I construct the rest of my narrative.
For example, when I was starting my most recent role, I doodled the diagram you see below on a piece of paper. It was my way of thinking about how I intended to play my role as head of culture at Thoughtworks. After a few more hours of scribbling and making notes, I reproduced the diagram on a slide. I built my final slide deck using a combination of animations and nested slides. I’ll expand on this example further down in the article.
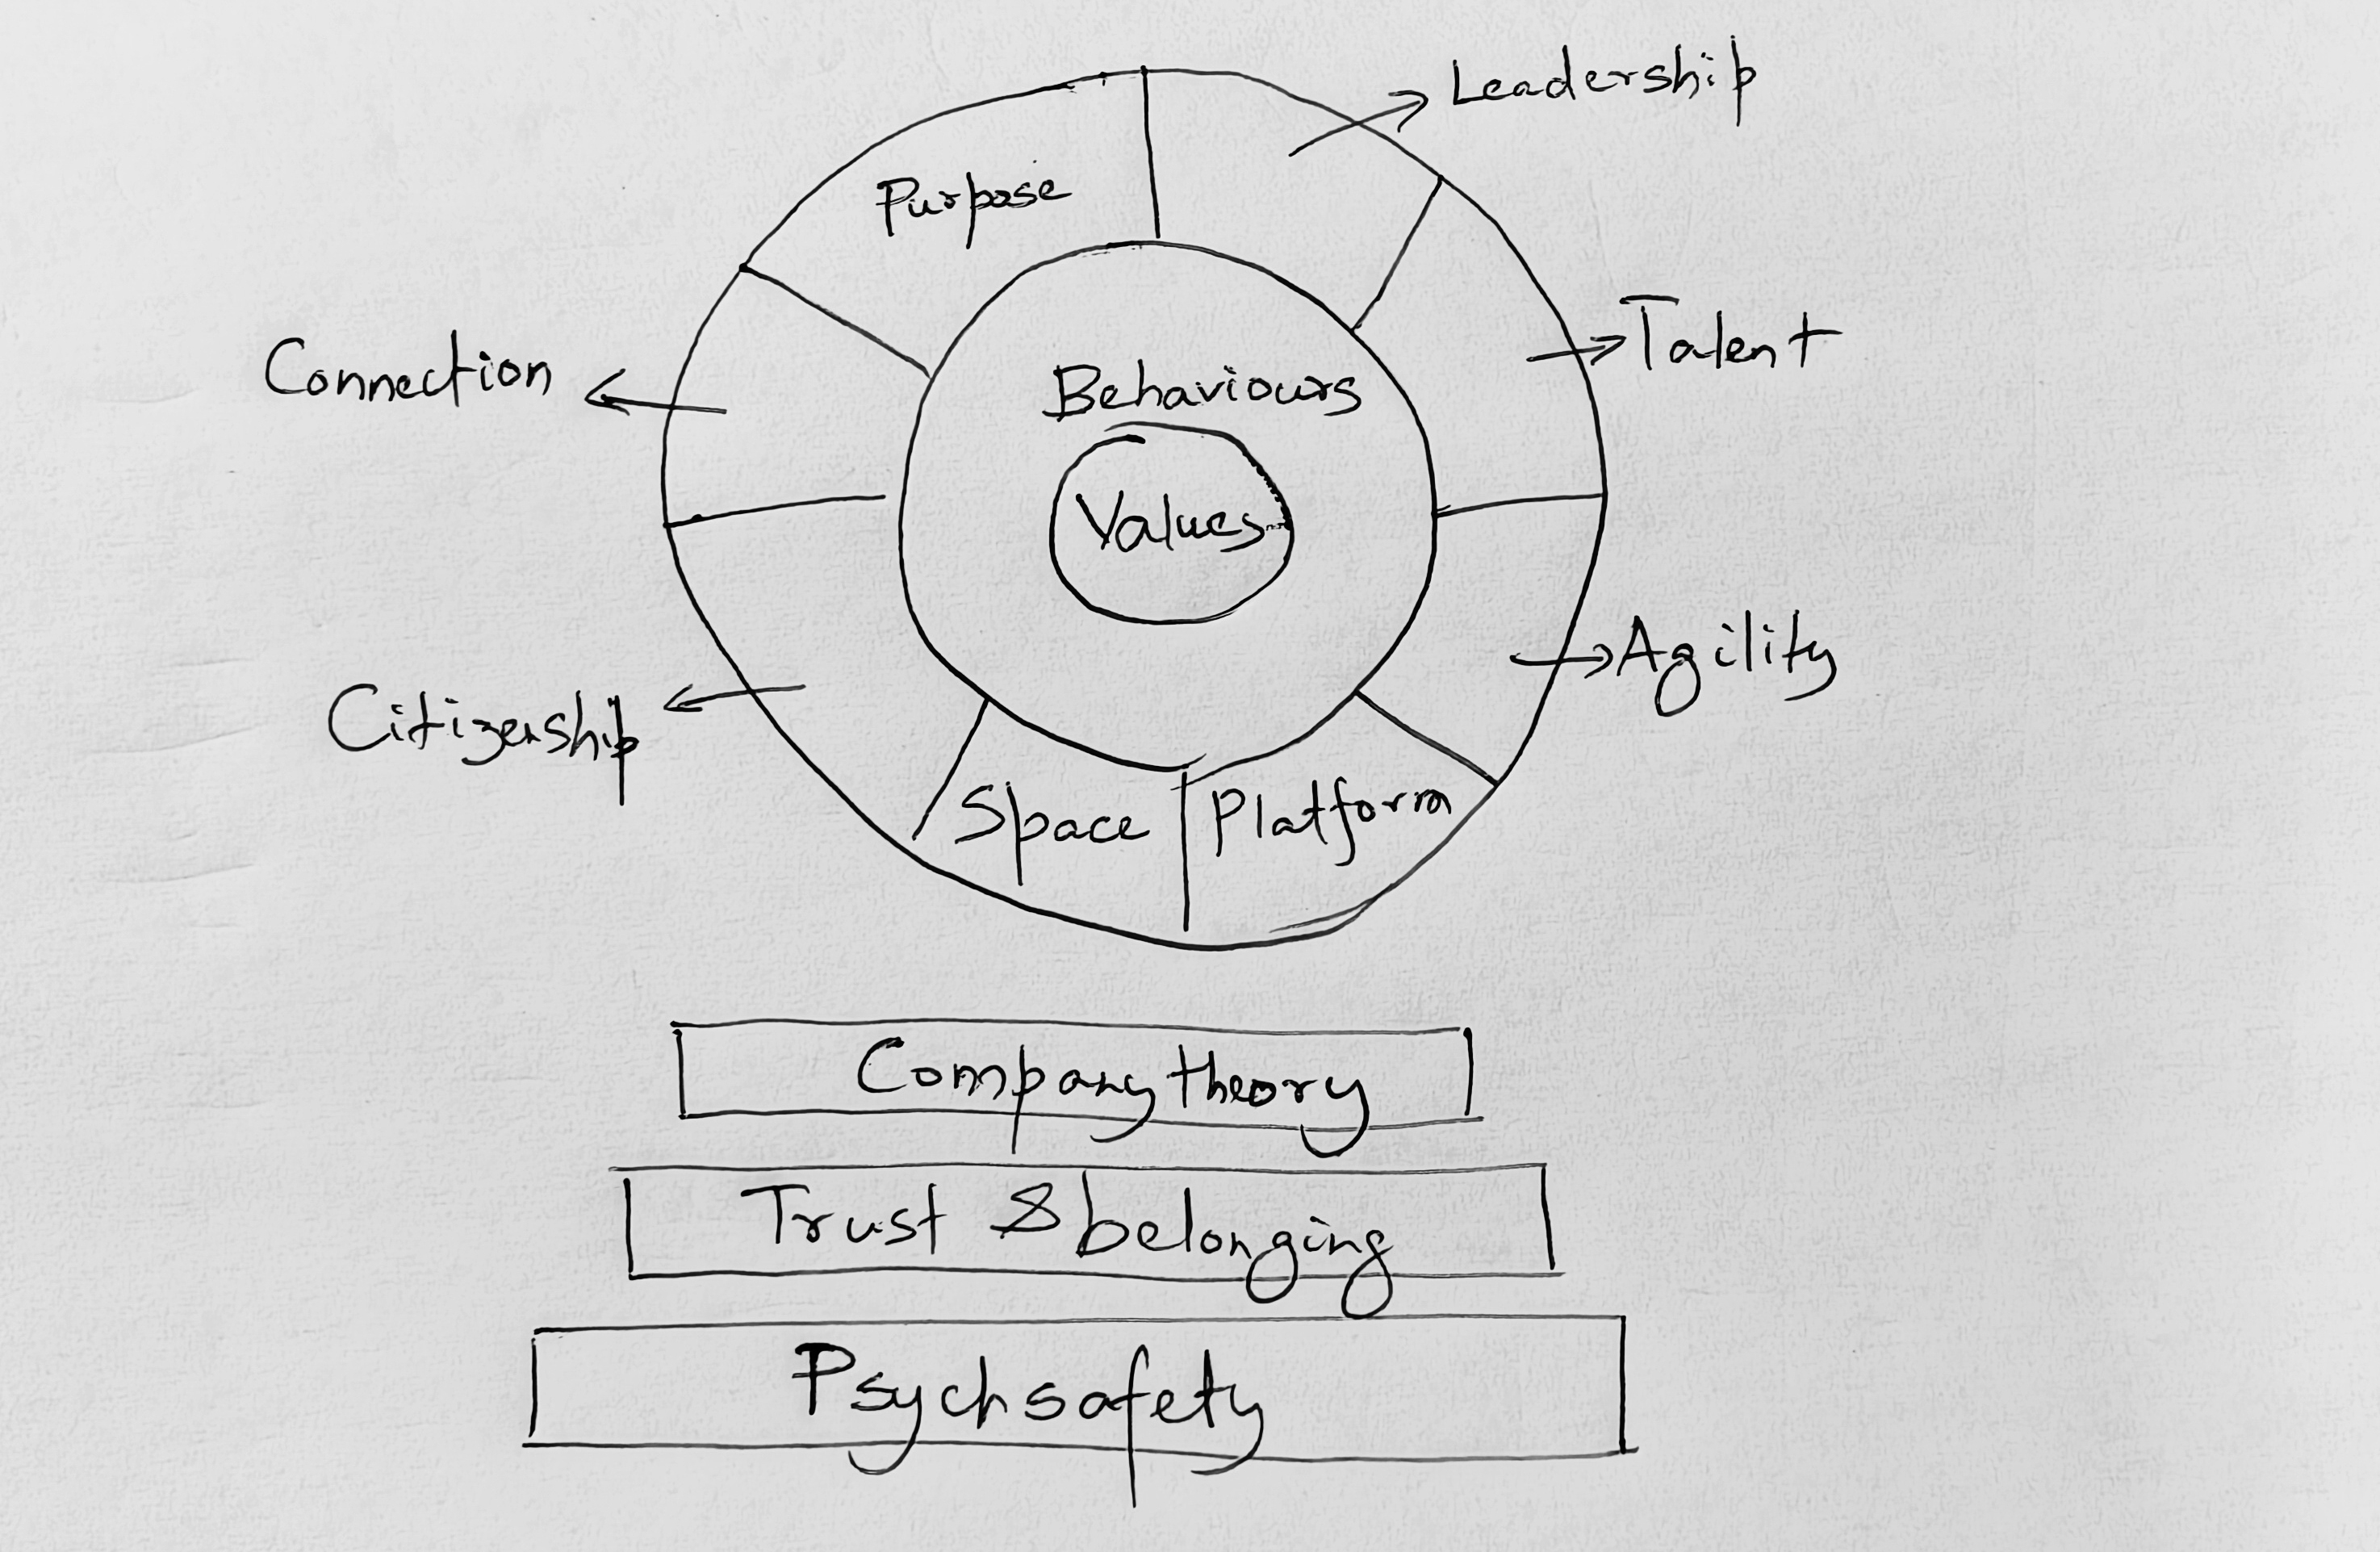
Figure 2: A core diagram can start as an excellent spine for your narrative.
Narrative-based writing
If you don’t enjoy whiteboarding, I suggest writing your narrative in text. This approach can work well if you’re a solo presenter and prefer writing as a thinking tool. You can start with a bulleted structure for your ideas and flesh them out as you go.
If you want to use one of the story formats I described earlier, I’ve created a pack of Google Docs templates that you can use as an alternative to the Mural whiteboarding option.
Voice memos + AI
Since AI voice transcription has gotten better in recent years, I’ve also used voice memos to flesh out my thinking. The Voice Memos app on iOS and the Recorder app on Android offer excellent transcripts. Once you’ve picked a story structure, you can use these apps to record your thoughts for each segment, then pass the transcripts to any AI chatbot to clean up and structure your narrative draft. You may need to clean up the AI-produced draft, but with some practice and by creating some custom skills, you can push AI tools to get you close to a usable narrative. Of course, you can’t and shouldn’t outsource your thinking to AI.
Whichever approach you take, the success criterion remains the same — you should know your narrative well enough to voice it without any visual aids. And if you achieve that outcome, you’ll have a solid narrative platform, which you can then enhance using audio-visual aids.
Create a storyboard to make your plan concrete
Almost there. One more step. Your narrative is a clarifying artefact for what you want to say. You now need some clarity on what you want to show. This is where a storyboard comes in handy.
The simplest storyboard describes each slide you create in as simple a way as you can get away with. If you’re already using a physical or virtual whiteboard, sticky notes or index cards can help you build that storyboard — one sticky note to describe each slide. The Mural template I shared also has a panel to organise your storyboard. As I’ve explained earlier, don’t worry about the number of sticky notes. The slide count doesn’t matter when you control the pace of your presentation.
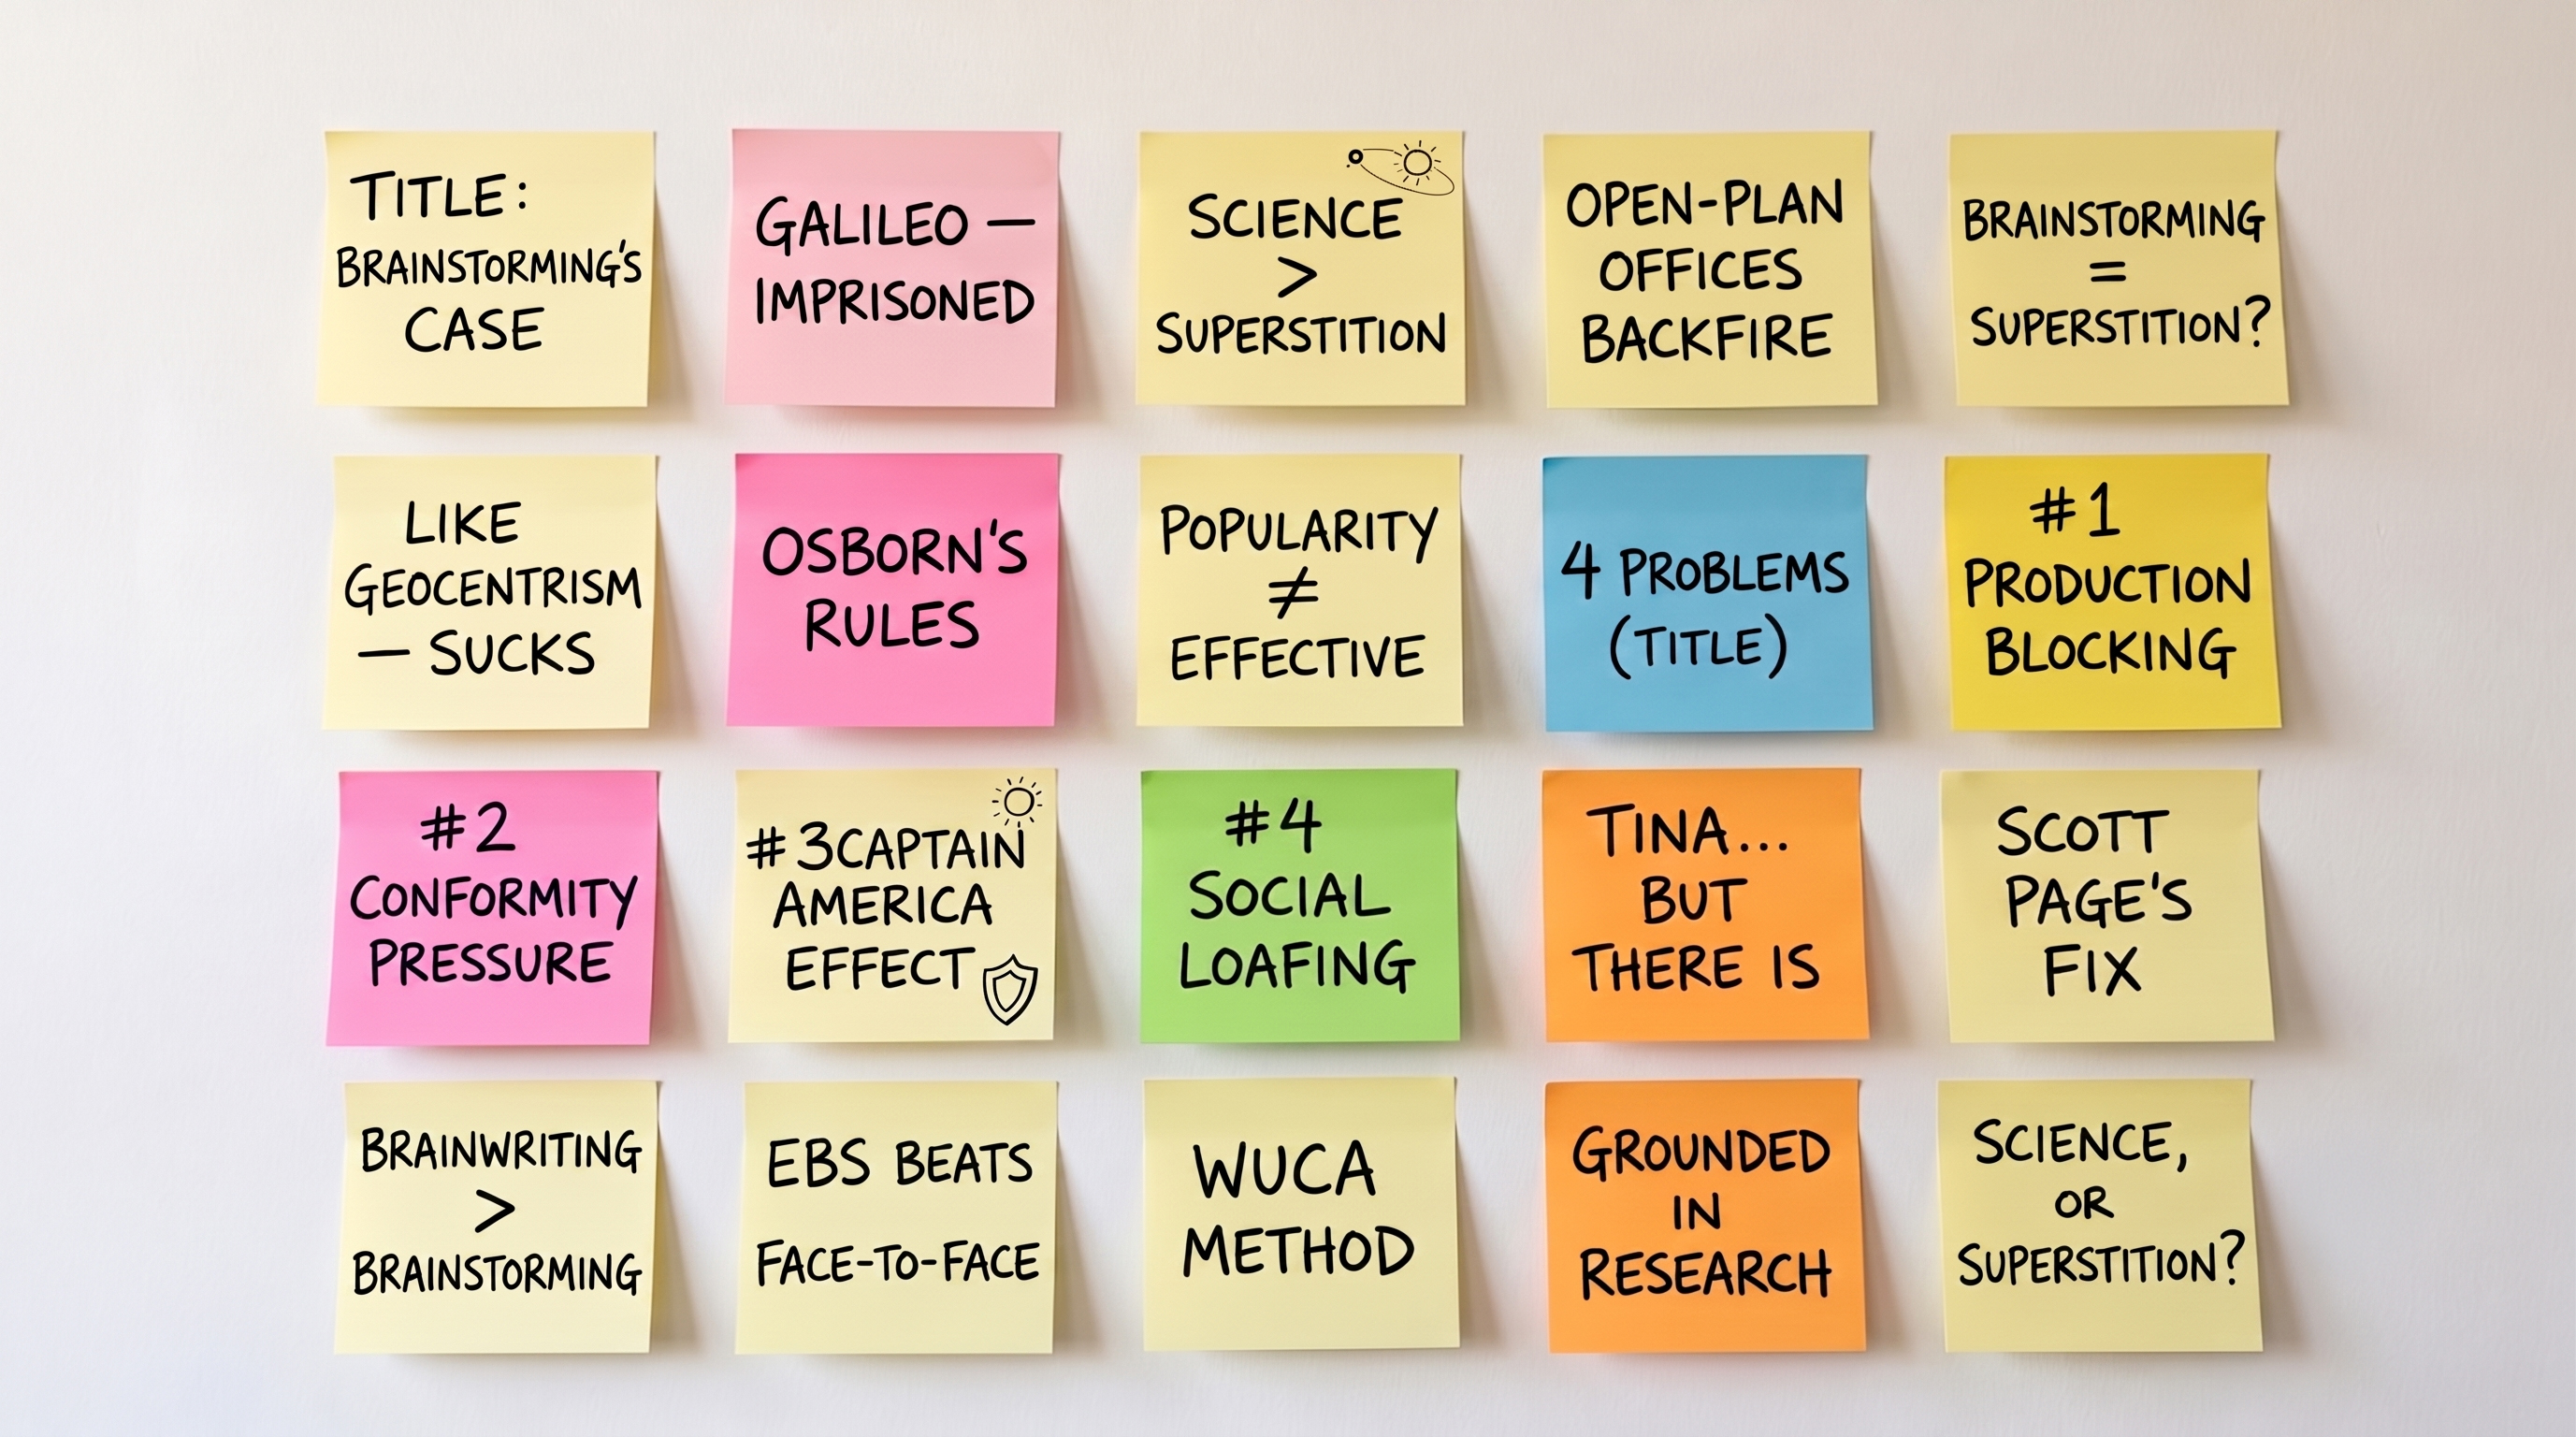
Figure 3: A storyboard with sticky notes. (generated using AI)
You can also use documents to create your storyboard, though they aren’t as flexible as sticky notes. The Google Docs template pack also has a storyboarding template you can use.
Storyboarding using slides
These days, I often create my storyboards using slides, especially when I use a diagram-centric narrative. The slide sorter or light table view in your presentation tool is excellent for creating storyboards because it allows me to drop in text and sample images and reorder my panels until I’m satisfied with the plan.
The trick with slide-based storyboarding is to resist the temptation to design slides. When storyboarding this way, I limit my focus to the spine of my slide deck. The polish comes later.
Remember the diagram I shared earlier in this article? The images below show my final diagram, the storyboard that I created using that diagram as the spine, and then a light-table view of the final deck after I added a few layers of polish.
If you’re accustomed to starting your presentation design by opening a presentation tool, my suggested approach will perhaps feel onerous. From experience teaching presentation skills to hundreds of Thoughtworks colleagues, I find this approach to be a way to start slow so I can go fast later. Once you try this approach a few times, you’ll notice that it doesn’t take as much effort as you may fear. It also speeds up slide creation because you work from a plan rather than playing it by ear.
On the other hand, if you’re a skilful presenter, my suggested approach may seem rigid and linear. That’ll be a fair criticism. I’ll use a Pablo Picasso quote in response to that reaction.
Learn the rules like a pro, so you can break them like an artist.
-- Pablo Picasso
Here’s what I’ve noticed when coaching colleagues to present:
- Presenters who aren’t accustomed to thinking about their narrative, audience, and presentation outlines benefit from a structured approach to these aspects of their presentation.
- As people gain skill and experience, they shift to a more fluid process. They may skip a step because it feels intuitive, or they may bounce back and forth between other steps without adding to their cognitive load.
All this said, the narrative won’t be a static artefact. As you build your storyboard, you may tweak the narrative. Even as you design your slides, you may reconsider your narrative, storyboard, and even your assumptions about your audience. None of these artefacts and considerations is a one-and-done. The outline feeds the design, but the design can also challenge the outline. That’s the narrative you want walking into slide design: solid enough that building your slides becomes an exercise in execution, not invention, yet open enough to flex when the details teach you something new.
With that narrative platform in hand, let’s explore some principles for slide design in the next few posts.
Acknowledgments
Thanks to Martin Fowler for reminding me of the diagram-centric narrative approach that I’ve used in recent years, and how useful slides can be as a storyboarding interface.
Anuroop Krishnan, Manish Vaidya, Gayathri Moghe, Raghvi Behl, KK Sure and Gill Taylor reviewed drafts of this article while it was under construction.
I have used Grammarly to proofread and copy-edit this essay. Claude helped me create Google Docs alternatives to my original Mural template, and to double-check if I had addressed all feedback I’d received for this article. I also used Gemini to generate a photograph of a storyboard example, since I don’t have a photo of my original whiteboarding exercise.
Significant Revisions
15 September 2026: first published
30 September 2026: Added a sidebar about how audience dynamics affect presentation design.
latest post (Oct 14):
previous post:
next post: